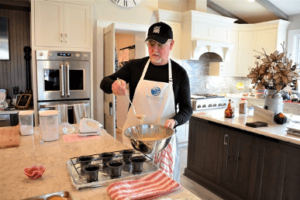
As foodies, Jim and I have always been fascinated by the popover. We’ve seen this enticing comfort food on cooking shows but had no idea how to make it ourselves.
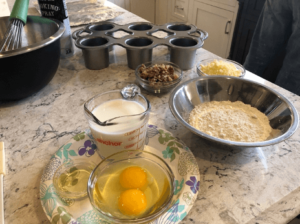
That’s why we decided to take the popover challenge. It has been our dream to offer to our guests a cooking class, and the popover experiment was the challenge we needed to do it.
We began experimenting with tried and true recipes from sites like Pinterest, but the results were not what we expected as bakers.
The first batch, Rosemary and Gruyere, more than doubled in height and had a fairly good crunch on the outside. But the taste? A bit flat.
Since I like to challenge Jim on flavor profiles, I would ask, “What if we try this? Or that?” And, “How about this? It sounds yummy.” Together, we puzzled through our ideas to try and come up with the perfect popover recipe.
Naturally, that’s when we created our first disaster, the blueberry and lemon popover. It was dense as a brick and didn’t rise more than a ½ inch.
The Answer to “How Do You Keep Popovers from Deflating?”
Of course, that’s the question, isn’t it? Well, we have two answers for you. First, don’t put 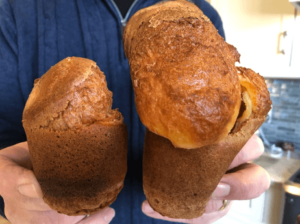
Secondly, the batter must be thin and pourable. Our extra sharp cheddar cheese and bacon popover experiment had batter that was way too thick. They tasted fine but didn’t rise much at all.
That taught us the importance of using only a small amount of finely shredded cheese to keep the batter light. And for the blueberry and lemon popover, only add a little lemon zest; no lemon juice.
What Made the Perfect Popover Base Recipe?
For us, the final test prior to our first cooking class was a recipe that I found from Neiman Marcus. It works beautifully!
Here are our recommendations with the recipe just below them:
· Use eggs that are room temperature, and make sure not to over warm the milk in the 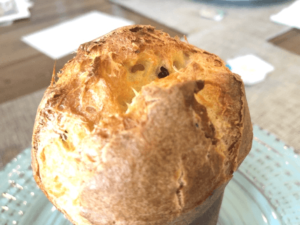
· Some of the popovers rose over three to four times the amount that went in the pop-over
pan
· We found it best to grease the Popover pan versus spraying them. I used Crisco, not the oil
· You don’t need to pre-warm the pan but do use an electric mixer to froth the egg mixture with gently warmed milk. Gradually add the flour. Add the warmed milk while continually using the hand mixer so the eggs are tempered and do not begin to cook.
· Make sure to let the batter rest for an hour
· We found it much easier to use a ladle to transfer the rested batter into the popover pans. Wipe up any drips as you go along. That makes for easier cleanup after baking
· Use a HIGH temp for the first 15 minutes, 450 F, but then leave them in the oven and reduce the temperature to 375F for 30-35 minutes—this is when the magic starts to happen! The popover will do a fair amount of rising at 450F, but the extra, crazy rise happened at the 375F phase
· Be extra careful when removing the baked popover out of the pans. They are full of steam and a potential burn could happen
· Let the popover rest briefly. Then gather everyone for some yummy good comfort food
· We made 3 compound butters to try on them, Rosemary and Thyme, Orange zest and Honey, and Lingonberry (Each turned out very good and complemented the popover well)
Now you’re ready for the perfect popover recipe!
Popovers
Whole Recipe: (makes 12)
3 ½ cups whole milk
6 large eggs
4 cups King Arthur Unbleached Flour
Half Recipe: (makes 6)
1 ¾ cup whole milk
Our First Cooking Class Fun
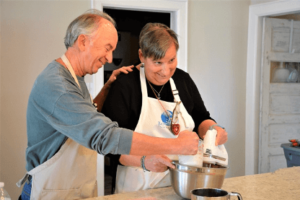
Each participant had their own station complete with recipes and tools. Jim led the class step by step through all three recipes:
-
Compound Butter
-
And, of course, our tried and true popover recipe
We shared baking tips throughout the class and then Jim added a delectable bonus recipe, the Inn’s “Ooey Gooey French Toast,” a make-ahead recipe that afforded our cooking student guests a hand in their breakfast for the next morning!
The Best Part of Any Cooking Class
You know this already. It’s eating the fruits of your labor. And that’s exactly what we did. We sat down and devoured the popovers (hot out of the oven and insanely delicious), the sweet potato biscuits, and the compound butters. The Ooey Gooey French toast would have to wait!
But really, the very best part of the day was the fellowship, laughter, and support between participants and us, the innkeepers. We truly do have the best job on earth!
Want to join the fun? Get more info on the next cooking class schedule by visiting @bayhaveninn on Instagram or Facebook.
Book your Virginia Eastern Shore getaway here.

